

How to Make Product Labels at Home for Your Small Business?
11th Aug 2025
TL;DRMaking product labels at home empowers small business owners to save time, reduce costs, and maintain full control over branding and compliance. Labels are crucial not only for branding and shelf appeal but also for meeting legal requirements such as ingredient disclosures, expiry dates, and barcodes. Common types of labels include branding labels, ingredient lists, compliance barcodes, and promotional stickers—each serving a distinct purpose. To create labels at home, you’ll need essential tools such as a label printer, appropriate label stock, cutting tools, laminator (optional), and suitable adhesives. Professional label design software like BarTender, NiceLabel, or Loftware ensures accuracy, scalability, and compliance—ideal for barcode and data-driven labels. The label creation process includes measuring packaging, designing your layout with fonts and colors, printing test runs, and carefully applying labels for a wrinkle-free finish. Printer selection matters: the blog highlights top models like Primera LX610, Godex G530, and Afinia L502, each with specific strengths for different label needs. OmegaBrand offers a complete ecosystem—from printers and materials to software and support—to help small businesses produce premium-quality, compliant labels at home. |
|---|
Running a small business often means wearing multiple hats, and that includes branding and packaging. One of the most effective ways to elevate your product presentation without outsourcing is to learn how to make product labels at home. Not only does this help you maintain control over your brand, but it also allows you to save time and money in the long run.
In this guide, we’ll walk you through everything you need to know to create professional-quality labels from home, including design tips, software recommendations, and printer options tailored for small business needs.
Understanding the Importance of Product Labels for Small Businesses
Before diving into the tools and steps, it’s essential to understand why product labels are such a crucial part of your business. A label isn’t just a sticker; it’s a key piece of your product’s identity and compliance strategy.
Why Product Labels Matter for Branding and Compliance?
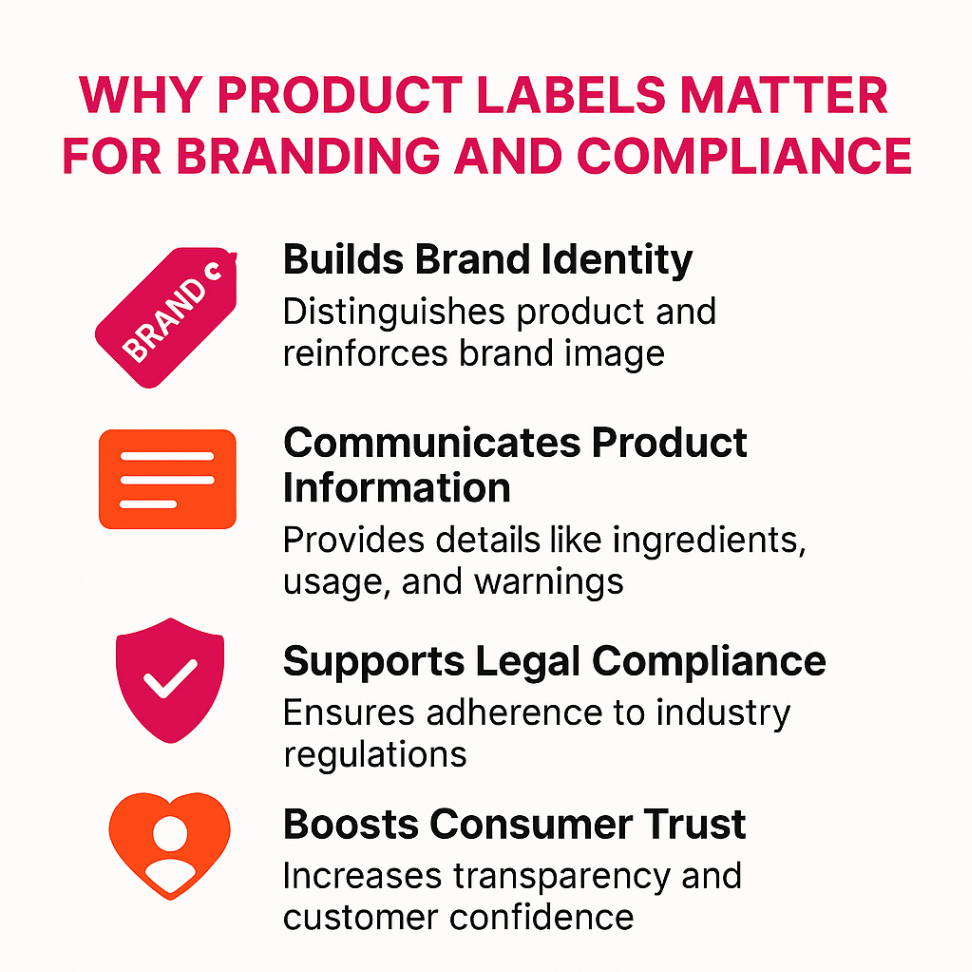
For small businesses, the product label is more than just packaging; it's a key marketing tool and a compliance necessity. A well-designed label can make your product stand out, build trust, and meet regulatory requirements all at once.
-
Builds Brand Identity:
Your label is often the first visual connection a customer has with your brand. It should reflect your logo, colours, fonts, and tone, helping you build a consistent and recognisable image across all your products. -
Communicates Product Information:
Labels share important details like product name, size or net weight, ingredients, and usage instructions. This clarity helps customers make informed choices and sets accurate expectations. -
Supports Legal Compliance:
Depending on your product type and region, labels may need to include required information such as manufacturer details, allergen declarations, barcodes, or expiration dates. Staying compliant reduces the risk of fines or product recalls. -
Boosts Consumer Trust:
A professional, well-organised label suggests your business is reliable and transparent. This not only builds credibility but also encourages repeat purchases and positive word-of-mouth.
What are the Common Types of Product Labels Used by Small Businesses?
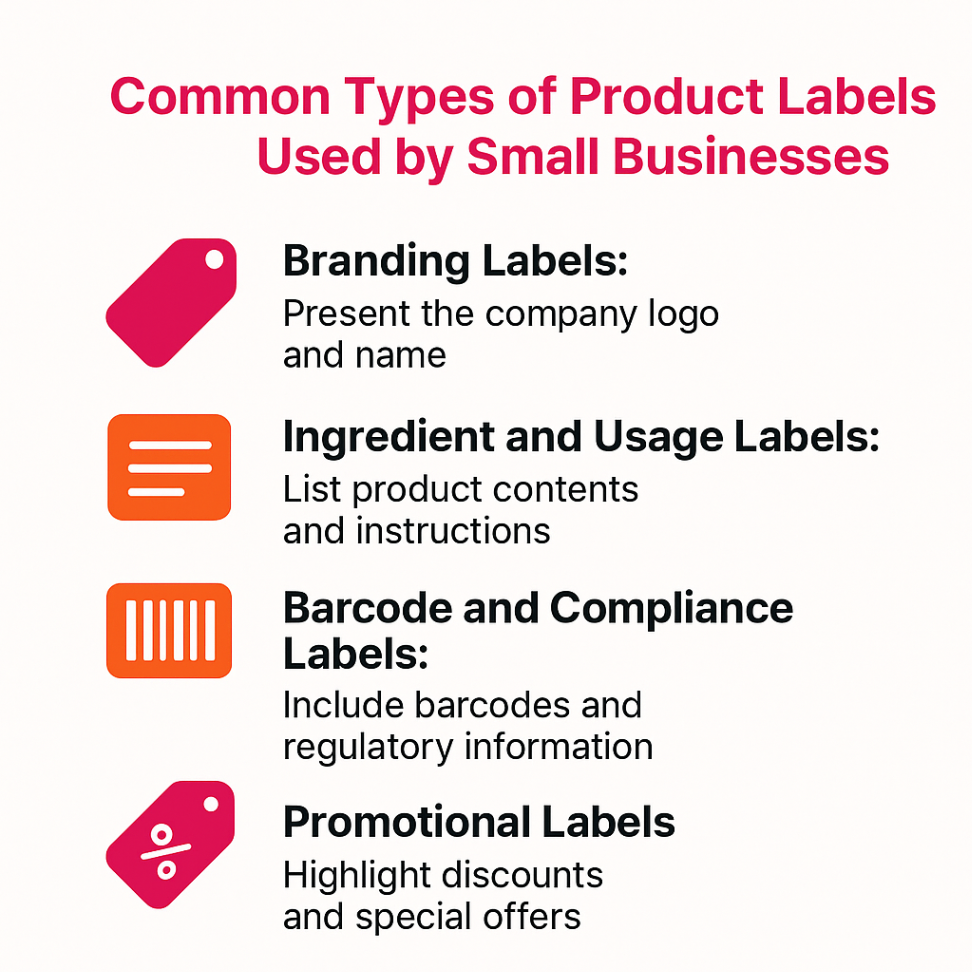
Not all labels serve the same purpose. As a small business, the type of label you choose should reflect both your product’s function and your customer’s expectations. Here are the most common types used by small business owners:
-
Branding Labels:
Typically placed on the front of jars, bottles, pouches, or boxes, these labels showcase your logo, product name, and design aesthetic. They’re essential for attracting attention and expressing brand personality. -
Ingredient and Usage Labels:
These go on the back or side of products, especially food, skincare, and handmade goods. They include ingredients, directions, storage tips, and warnings where necessary. -
Barcode and Compliance Labels:
Often required for retail, these include UPCs, batch numbers, expiry dates, or regulatory symbols. They help with inventory tracking and ensure you're meeting packaging regulations for your product category. -
Promotional Labels:
Used to highlight special offers, seasonal variants, or limited-edition items. These can be brightly coloured or uniquely shaped to stand out and create urgency around the purchase.
What You’ll Need to Make Product Labels at Home?
Before you start printing, it's important to gather the right tools to ensure your product labels look professional, meet industry standards, and align with your brand. If you're serious about learning how to make product labels at home, investing in the right setup will save time, reduce errors, and give your business the flexibility to grow.
Let’s break down what you’ll need, from essential equipment to the right software for precision labelling.
What are the Essential Equipment and Materials Needed for Making Product Labels at Home?
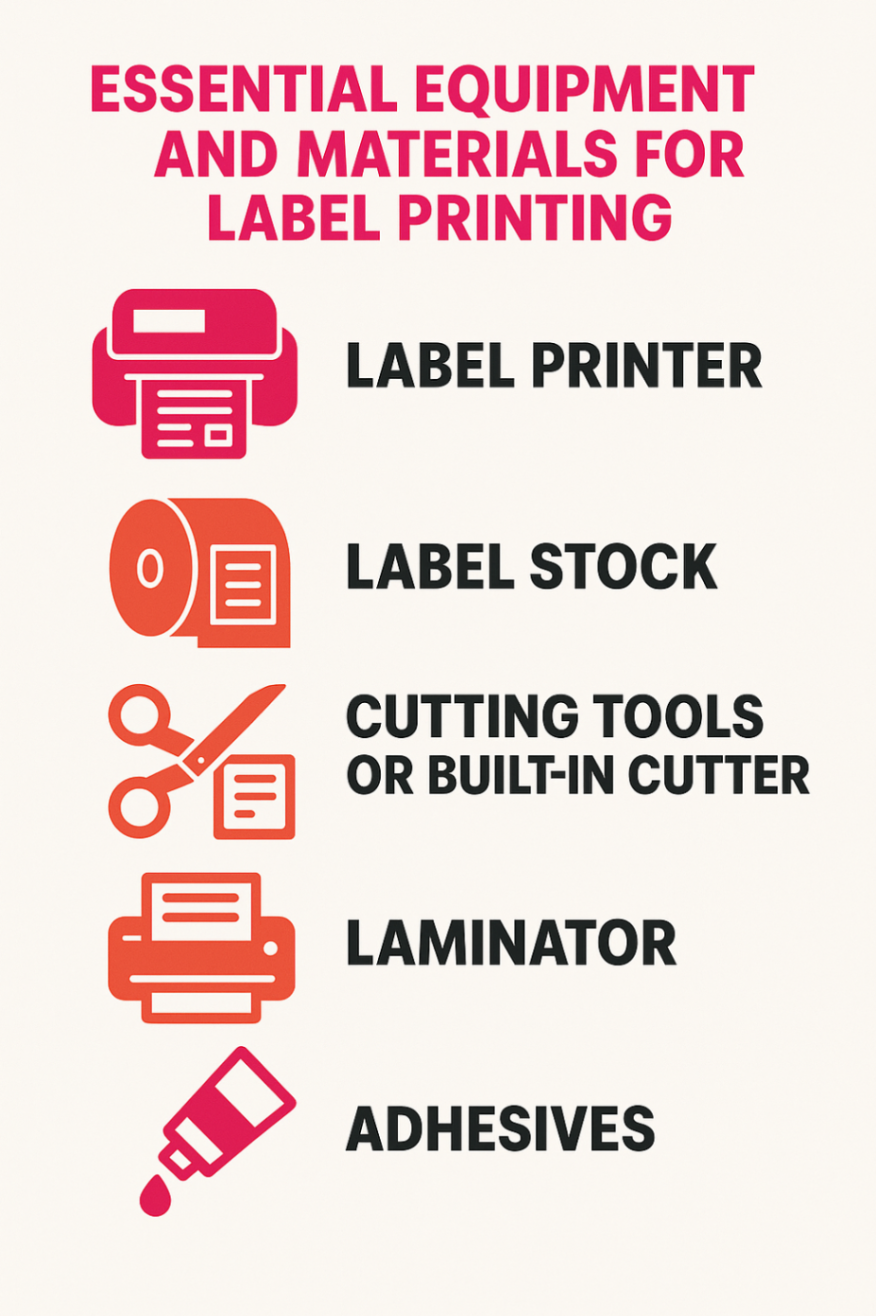
Creating labels at home doesn’t require an industrial setup, but it does call for reliable tools and materials that can handle your product and packaging needs.
Here’s what you’ll need:
-
Label Printer: Choose one that suits your label size, material type, and print volume. Inkjet printers are great for full-colour designs, while thermal transfer printers are ideal for compliance and barcode labels.
-
Label Stock: Select label materials based on your product’s storage and usage. Options include matte or glossy paper, waterproof synthetic films, and direct thermal labels for barcode applications.
-
Cutting Tools or Built-in Cutter: Some printers, like the Primera LX610, have integrated cutters. If not, you may need a manual trimmer or digital cutter to get your desired shape.
-
Laminator (Optional): If your labels need extra protection or a premium finish, a laminator can help improve durability, especially for outdoor or cosmetic use.
-
Adhesives: Ensure the backing is suitable for your product’s surface, glass, plastic, cardboard, or flexible packaging.
What are the Recommended Design Software and Templates?
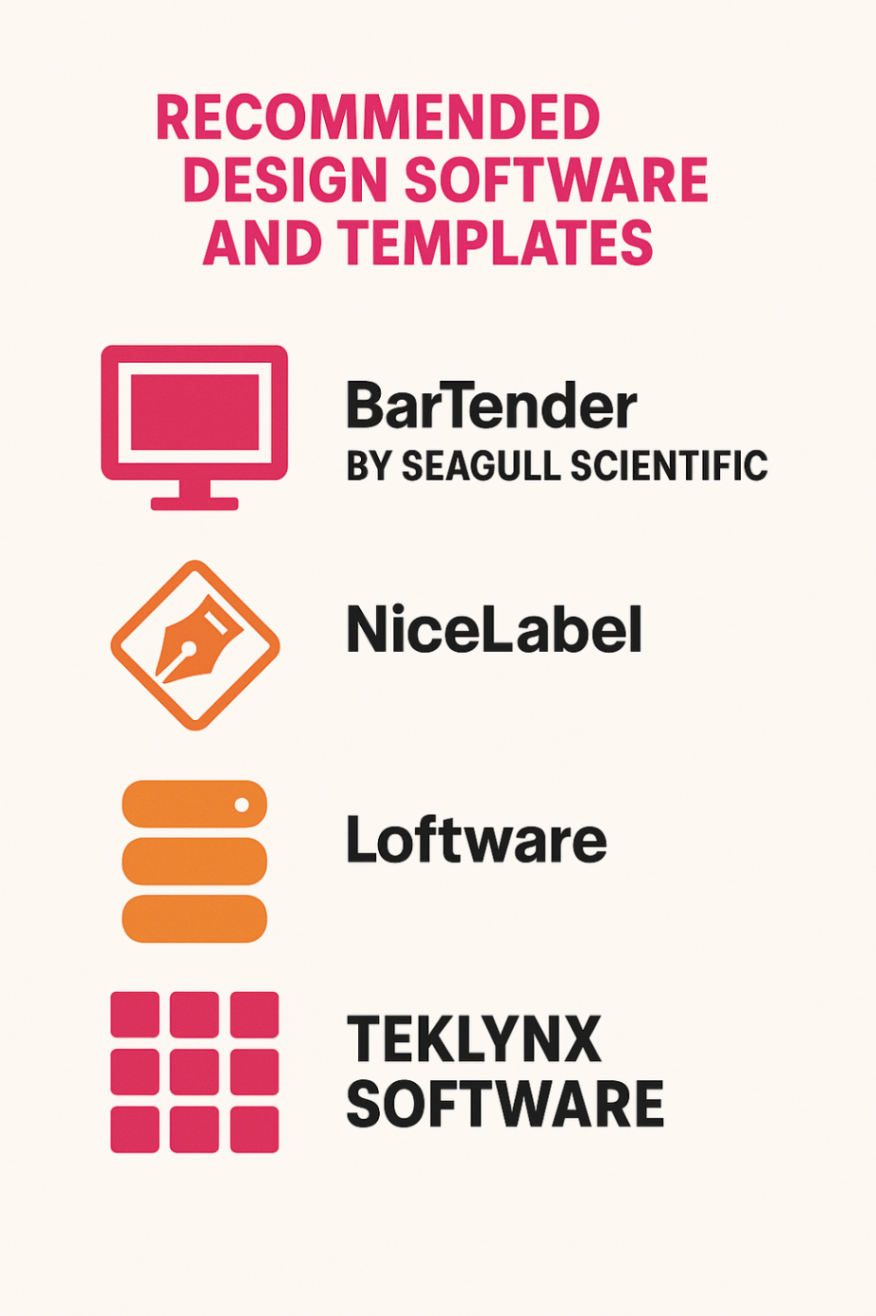
Designing a label that’s both attractive and compliant isn’t just about layout; it’s about precision. That’s where professional labelling software comes in. If you’re learning how to make product labels at home, using advanced label software ensures your designs meet both branding and barcode requirements without manual errors.
At OmegaBrand, we offer industry-leading software trusted by thousands of businesses:
-
BarTender by Seagull Scientific:
One of the most popular label design platforms for barcode generation, variable data, and template control. Ideal for businesses that need compliance-ready labels with integration capabilities. -
NiceLabel:
User-friendly but powerful, NiceLabel is great for small businesses that want to scale. It allows for quick label template creation and supports a wide range of label printers. -
Loftware:
Known for enterprise labelling, but also suitable for SMEs needing scalable solutions. Loftware ensures label consistency across product lines and supports global compliance standards. -
Teklynx Software:
Designed for manufacturers and distributors, Teklynx makes barcode labelling and data automation straightforward. It’s perfect for operations that need to manage inventory, serial numbers, or expiry dates across SKUs.
Explore your options and find the best fit for your labelling needs: www.omegabrand.com/barcode-software/
Step-by-Step Guide: How To Make Product Labels at Home?
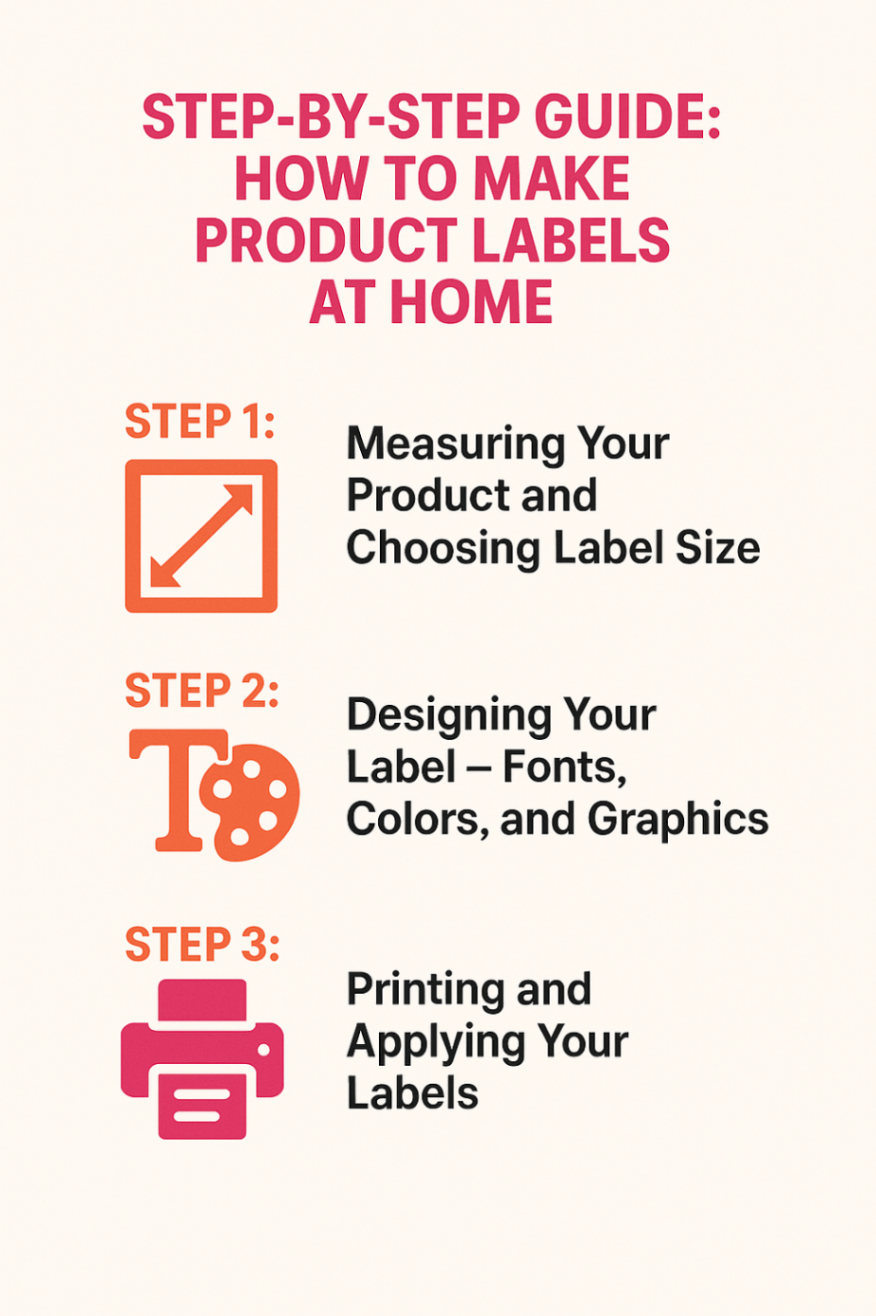
Once you have your equipment and software sorted, it’s time to put it all together. This step-by-step guide walks you through the process of making product labels at home, from measuring your packaging to applying the final label. Each step is designed to help you avoid common pitfalls and produce a label that looks professional and performs well in real-world conditions.
Step 1: Measuring Your Product and Choosing Label Size
Start by accurately measuring the surface where your label will be applied. Whether you're working with bottles, jars, pouches, or boxes, the label must fit the surface area without creasing or wrapping unevenly.
Use a flexible ruler or measuring tape to determine width and height. For curved surfaces like bottles, consider the contour and make sure your label won’t lift at the edges. It’s also worth testing a few label sizes using mock-ups or adhesive paper before committing to a bulk print.
Pro tip: Always account for label margins and printer calibration to avoid edge cropping or misalignment.
Once you know your dimensions, choose a label shape, rectangle, circle, oval, or custom die-cut, based on your product’s packaging and your brand’s visual style.
Step 2: Designing Your Label – Fonts, Colors, and Graphics
The design phase is where branding meets functionality. Using software like Bartender or NiceLabel (available via OmegaBrand), create a layout that balances visual appeal with readability.
-
Fonts: Choose clear, legible fonts for key information such as product name, net weight, ingredients, and instructions. Avoid decorative fonts for small text.
-
Colours: Use your brand’s colour palette to maintain consistency across products. Ensure a strong contrast between text and background for readability, especially if printing on coloured or transparent labels.
-
Graphics: Include high-resolution versions of your brand logo, product imagery, and regulatory symbols (e.g., recycling, allergen warnings, barcodes).
Most label design software offers built-in templates, drag-and-drop tools, and print previews to help you optimise layout. You can also add variable fields for batch numbers or expiry dates if you're printing on demand.
Step 3: Printing and Applying Your Labels
Once your design is finalised, it’s time to print. Load the correct label stock into your printer and run a test sheet to check alignment, colour accuracy, and clarity. Ensure your printer settings match the label material type and printer type, for example, matte paper, synthetic film, or direct thermal stock.
For best results:
-
Set the print resolution to at least 300 dpi (dots per inch)
-
Use pigment-based inks for waterproof and fade-resistant labels
-
Print in batches to reduce waste and correct issues early
After printing, apply the labels to clean, dry surfaces. Start from one edge and press firmly to avoid air bubbles or wrinkles. If you’re applying labels manually, consider using a guide tool or applicator for better precision, especially with cylindrical containers.
Optional: If your product will be exposed to moisture, heat, or handling, consider laminating the labels or choosing weather-resistant material during printing.
What are the Best Home Printers for Making Product Labels?
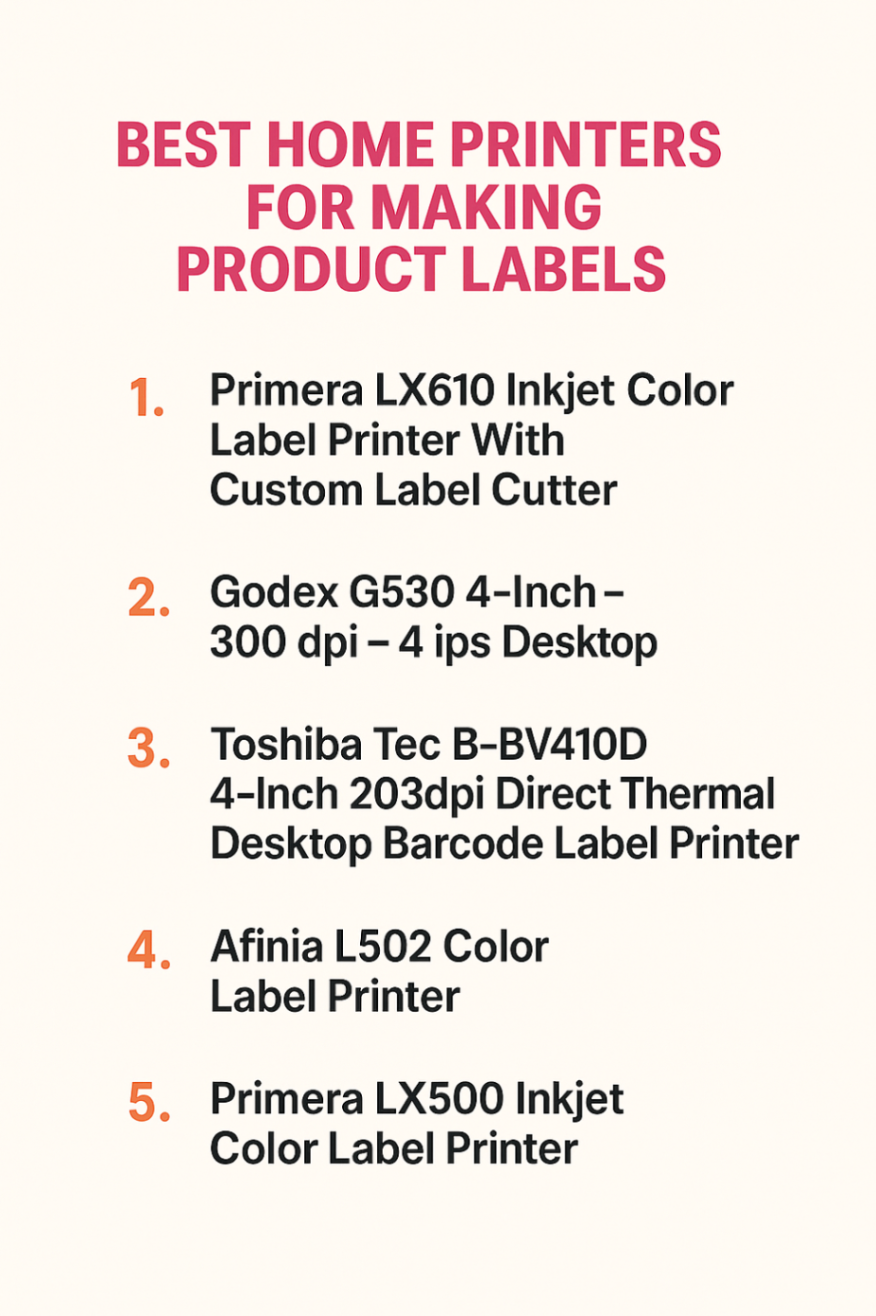
Choosing the right printer is one of the most important decisions when learning how to make product labels at home. Below is a detailed overview of high-performance home and desktop label printers sold by OmegaBrand. These models are perfect for small businesses that want to print vibrant, compliant, or durable labels in-house.
1. Primera LX610 Inkjet Color Label Printer With Custom Label Cutter
The Primera LX610 combines full-colour inkjet printing with a built-in digital die-cutter, allowing you to print and cut custom-shaped labels in a single workflow. It supports a wide range of materials and is perfect for producing short-run, full-colour labels for jars, pouches, or retail packaging.
Key Specs:
-
Print Method: Dye-based inkjet
-
Resolution: Up to 4800 dpi
-
Built-in digital die cutter
-
Ideal for: Custom product labels, retail packaging, short-run production
Pros:
-
Prints and cuts labels in one go
-
Excellent print resolution
-
Great for bespoke, on-demand labels
Cons:
-
Limited to dye inks (less water-resistant)
-
Best suited for short to medium runs
2. Godex G530 4-Inch - 300 dpi - 4 ips Desktop
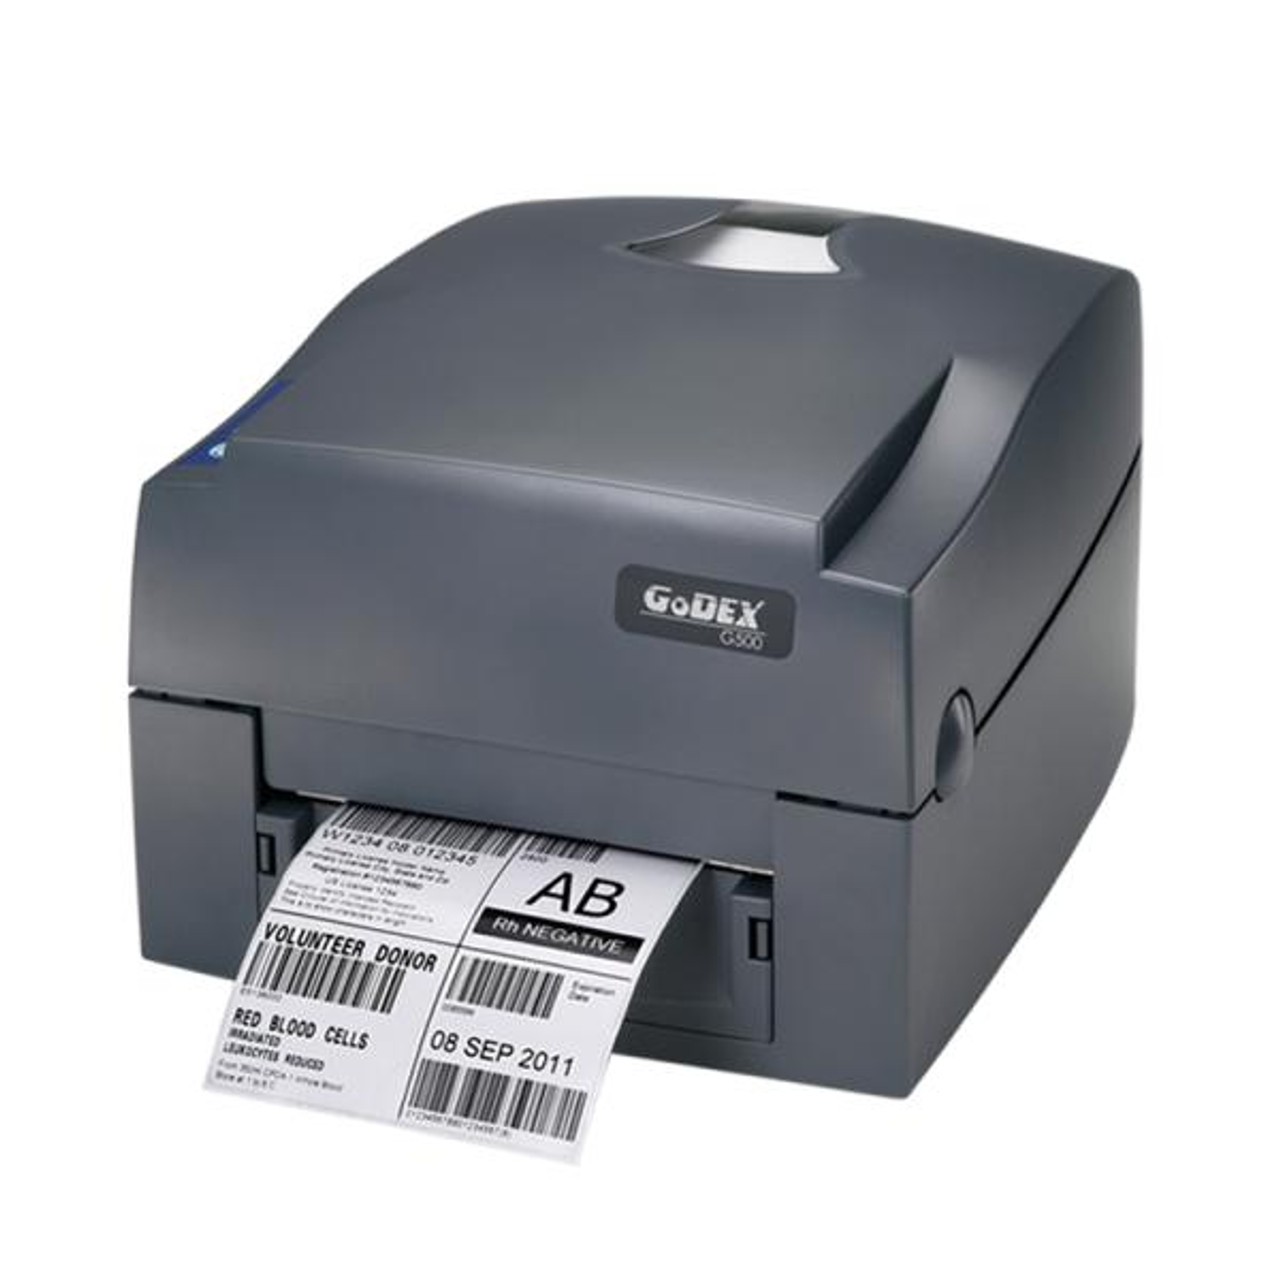
The Godex G530 kit is an industrial-grade thermal transfer label printer designed for apparel, wash care, and compliance labelling. It includes the G530 printer, guillotine textile cutter, and external unwinder for long label rolls.
Key Specs:
-
Print Method: Thermal transfer
-
Print Speed: 4 ips
-
Resolution: 300 dpi
-
Includes: Guillotine cutter, external unwinder
-
Ideal for: Apparel labels, wash care tags, barcode labels
Pros:
-
High durability for textile applications
-
Full kit with cutter and unwinder
-
Compatible with nylon, satin, and polyester labels
Cons:
-
Monochrome output only (no colour printing)
-
Best for industrial and garment labelling, not retail branding
3. Toshiba Tec B-BV410D 4-Inch 203dpi Direct Thermal Desktop Barcode Label Printer

Toshiba Tec B-BV410D compact, energy-efficient printer is ideal for printing barcodes, shipping labels, and basic product IDs. It offers reliable direct thermal performance with USB and LAN connectivity.
Key Specs:
-
Print Method: Direct thermal
-
Resolution: 203 dpi
-
Print Speed: 7 ips
-
Ideal for: Barcodes, logistics, inventory tags
Pros:
-
Fast printing
-
Compact design
-
Great for warehouse or back-office use
Cons:
-
No colour printing
-
Labels are heat-sensitive (not for long-term display or outdoor use)
4. Afinia L502 Color Label Printer
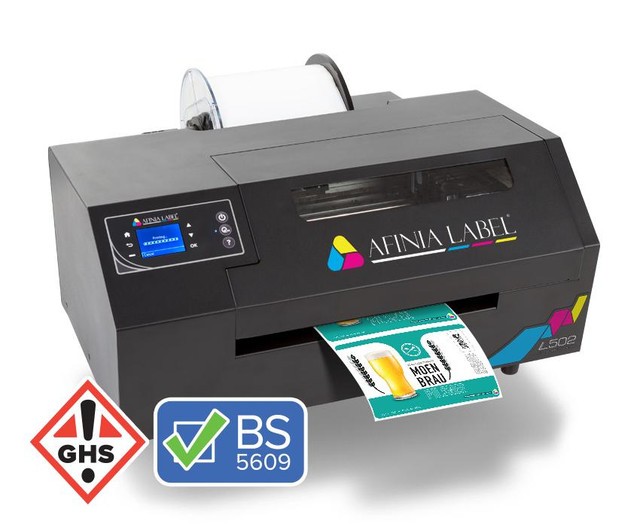
The Afinia L502 is built for rugged, durable labelling. It meets GHS BS5609 standards for chemical and industrial applications. With pigment-based CMYK inks and an all-steel frame, it's suitable for harsh environments where water, abrasion, and UV resistance are critical.
Key Specs:
-
Print Method: Pigment inkjet
-
Resolution: 4800 dpi
-
Print Width: Up to 8.5"
-
BS5609 Certified
-
Ideal for: Chemical labelling, outdoor packaging, industrial use
Pros:
-
Prints durable, waterproof, and compliant labels
-
Supports wide-format printing (up to 8.5")
-
Compatible with pigment and dye inks
Cons:
-
Higher initial investment
-
Overkill for basic retail or promotional labelling
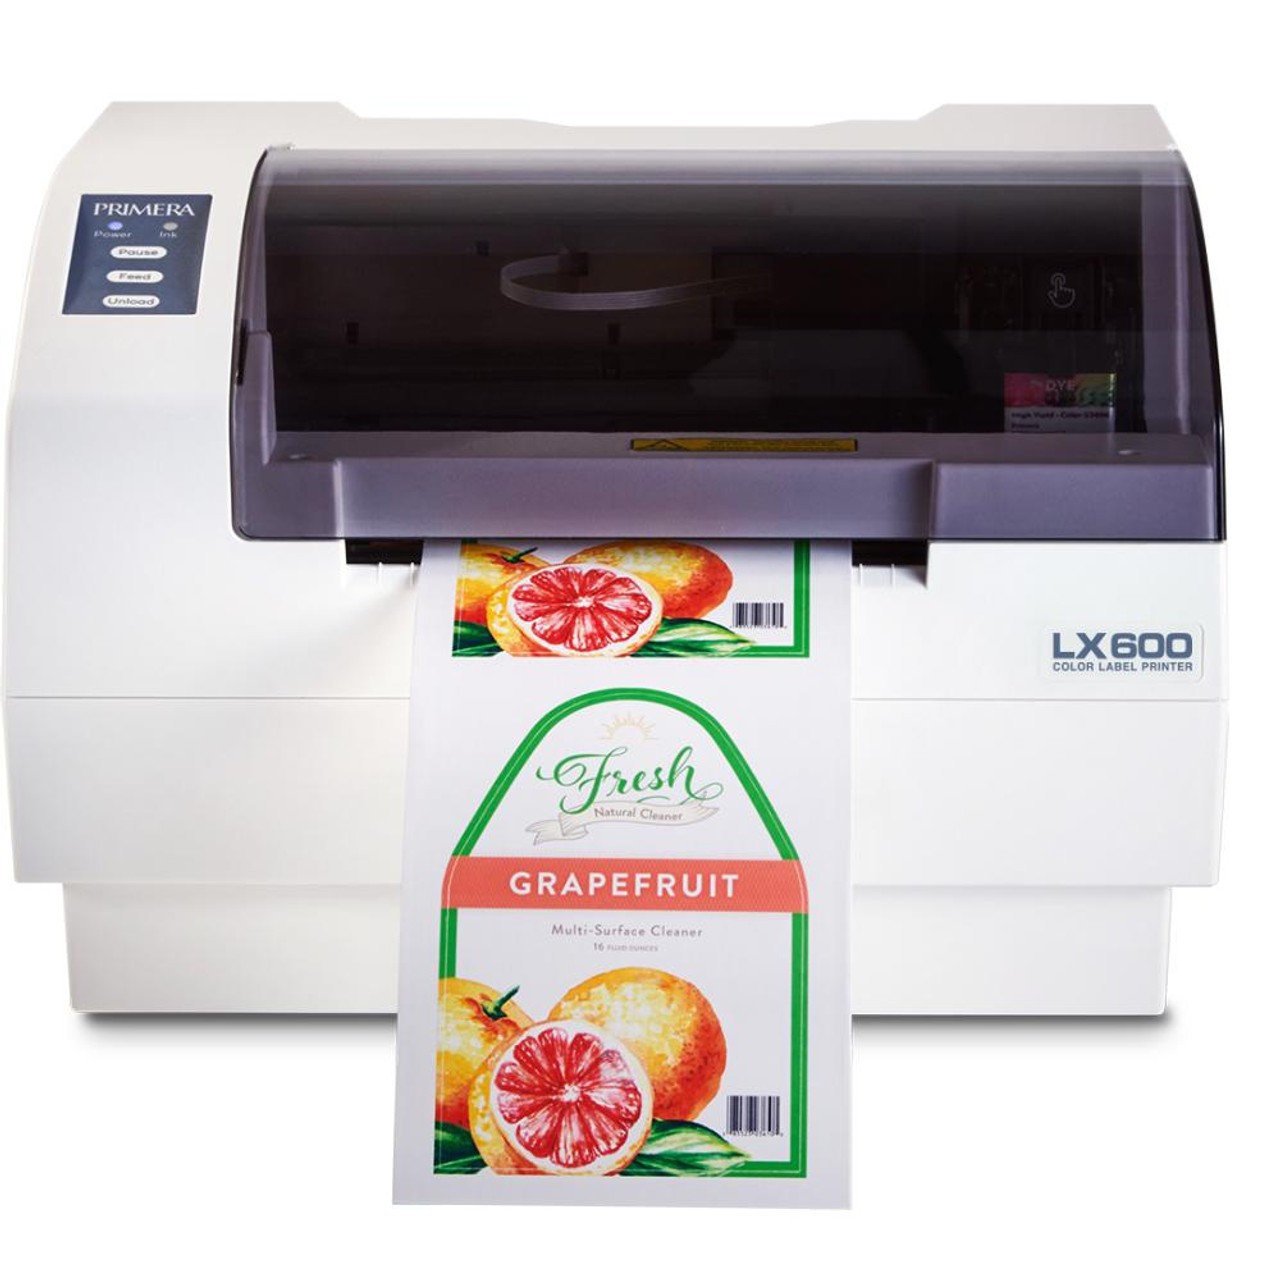
5. Primera LX500 Inkjet Color Label Printer
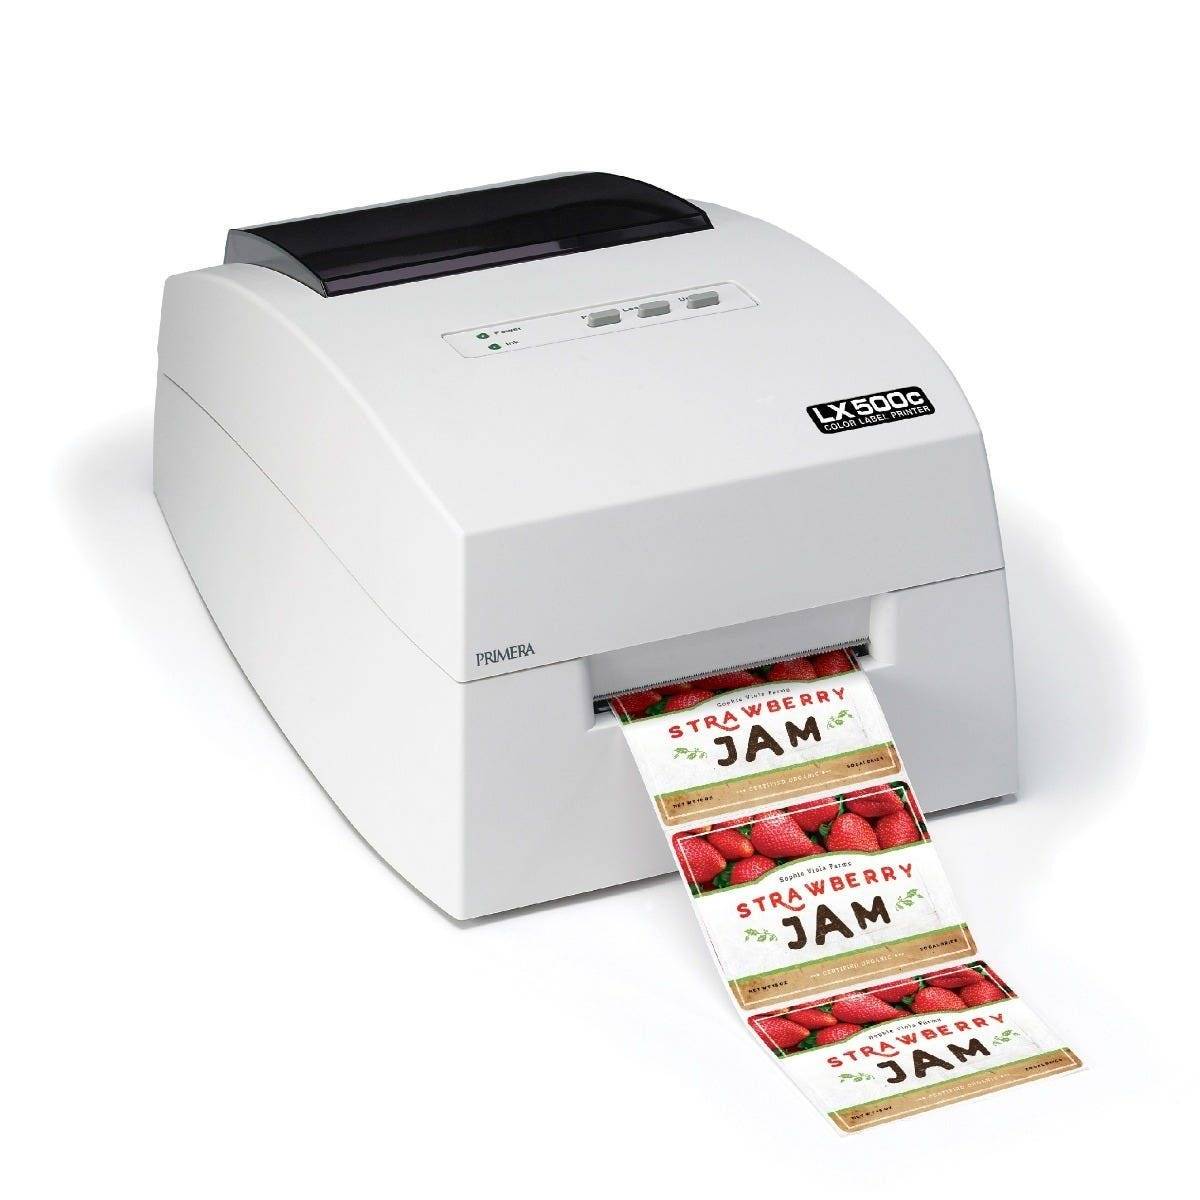
Compact and beginner-friendly, the LX500 offers professional-quality dye-based inkjet printing and includes a built-in cutter for flexible label sizing. It’s ideal for product labels, promotional stickers, and small batch packaging.
Key Specs:
-
Print Method: Dye inkjet
-
Resolution: 4800 dpi
-
Built-in cutter
-
Ideal for: Product labels, shipping labels, artisan packaging
Pros:
-
Excellent print quality in a small footprint
-
Easy to set up and use
-
Works with various label materials
Cons:
-
Uses a tri-colour cartridge (higher ink costs)
-
Limited to 4" wide avery labels
Power Your Labels with OmegaBrand’s Expert Tools and Support
Whether you're just starting out or scaling up your small business, having the right labelling system in place makes a world of difference. At OmegaBrand, we specialise in helping businesses like yours take full control of their branding, packaging, and compliance, right from your workspace.
From premium label printers to certified BS5609 materials, and from beginner-friendly tools to enterprise-grade design software like BarTender and NiceLabel, we offer everything you need to create stunning, durable, and compliant product labels at home.
-
Expert-curated printer kits for every budget and label type
-
Professional design software for accurate barcoding and branding
-
A wide range of label materials, from waterproof synthetics to glossy finishes
-
Fast, reliable shipping and industry-trained support staff
Need help choosing the right setup for your product?
Schedule a call with our team or explore our software & printer solutions today.
Conclusion
Learning how to make product labels at home gives you the freedom to customise, scale, and stand out. With the right tools, label printer, professional software, and high-quality materials, you can create print labels that reflect your brand’s quality, meet regulatory standards, and drive customer trust.
No more outsourcing delays or generic packaging, just efficient, professional, and on-brand labelling made simple with OmegaBrand.
Ready to bring your labels to life? Start today with the tools that empower your small business to look like a big one.
Frequently Asked Questions:
How do I choose the right materials for my product labels?
When learning how to make product labels at home, consider your product’s environment. Use waterproof synthetics for moisture-prone goods and matte or glossy paper for dry storage. Material choice affects durability, appearance, and adhesion; choose based on packaging surface, exposure, and customer expectations.
Can I print waterproof or durable address labels at home?
Yes, you can print waterproof labels at home by using pigment-based inks and compatible synthetic materials. If you're exploring how to make product labels at home for cosmetics, chilled items, or industrial use, invest in a printer like the Afinia L502 with durable ink.
What should I include on my label to comply with U.S. regulations?
Essential elements include brand name, product title, net quantity, ingredients (if applicable), manufacturer details, barcodes, and expiration dates. When exploring how to make product labels at home, always cross-check with FDA or FTC guidelines specific to your product category.
Are there free tools available for designing product labels?
There are free tools for basic layouts, but they lack the precision needed for compliance or barcode printing. If you're serious about learning how to make product labels at home, consider investing in software like BarTender or NiceLabel for professional-grade design and data accuracy.